Creating a compost bin at home is an excellent way to recycle organic waste while enriching your garden soil.
Whether you’re a gardening novice or an experienced horticulturist, knowing how to build a compost bin can transform your kitchen scraps and yard waste into valuable compost.
Why Should You Build a Compost Bin?
Building a compost bin not only aids in waste reduction but also brings many environmental benefits. Composting can improve soil health, promote plant growth, and reduce landfill waste. Below are a few compelling reasons to build a compost bin:
- Reduce Waste: Composting diverts organic waste from landfills.
- Enhance Soil Quality: Compost enriches soil, leading to healthier plants.
- Sustainable Gardening: It promotes sustainable gardening practices, allowing you to grow healthier veggies and flowers.
- Cost-Effective: Creating your compost can save money on fertilizer purchases.
What Materials Do You Need?
To understand how to build a compost bin effectively, let’s gather the necessary materials. Here’s a simple list:
- Wood: Untreated lumber pieces (e.g., pallets, planks) or wooden boxes.
- Wire Fencing: Rabbit or chicken wire to create a more open design.
- Hinges or Latches: If you’re building a lid or door.
- Power Drill or Hammer: For fastening the bin components.
- Screws or Nails: To secure the structure.
- Optional: A compost thermometer for monitoring compost temperature.
How Do You Choose the Right Location?
Finding the right spot for your compost bin is crucial for successful composting. Here’s what to consider:
- Accessibility: Place it near your kitchen for easy waste collection.
- Sunlight: A sunny spot helps with the composting process, but partial shade can help in hot climates.
- Drainage: Ensure proper drainage to keep the compost moist but not soggy.
- Away from Plants: Place it at least a few feet away from fruit trees, since they may be harmed by high nitrogen levels.
How to Build a Compost Bin Step-by-Step?
Now that you’re equipped with the materials and have chosen the right location, let’s delve into how to build a compost bin step-by-step.
Step 1: Decide on a Design
- Open Bin: Requires less material and allows airflow, but may be less visually appealing.
- Closed Bin: Better for odors and critter protection but uses more materials and may need ventilation.
- Tumbler Bin: Quick decomposition but requires a specialized design.
Step 2: Prepare the Base
- Clear the chosen area of grass and debris.
- Level the ground to create a solid base.
- If using a wooden structure, ensure it sits on an open area to allow drainage.
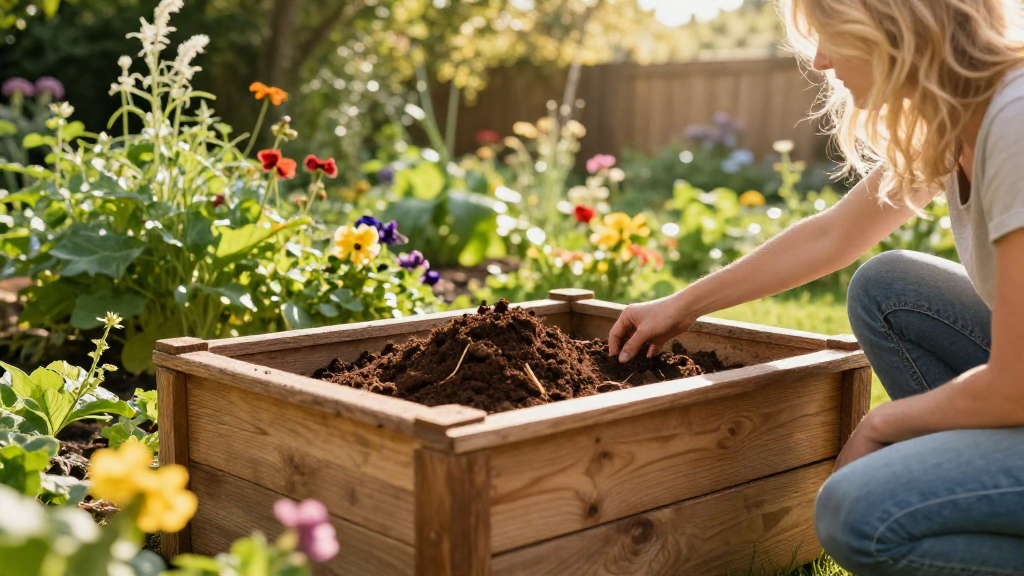
Step 3: Build the Walls
- For a wooden bin:
- Cut wood pieces to the desired size (typically 3 feet high and square).
-
Attach side pieces to form a cube or rectangular shape using screws or nails.
-
For wire fencing:
- Unroll the fencing and shape it into a circle or rectangle, securing the ends with wire or stakes.
Step 4: Create a Lid (Optional)
If you prefer to keep critters out and odors in, consider adding a lid:
- Use hinged wood planks or wire mesh that can be easily opened to add ingredients.
Step 5: Monitor and Maintain
- Browning and Turning:
-
For ongoing composting, turn the pile every 2-4 weeks to aerate and speed up the breakdown.
-
Moisture Levels:
-
Keep the compost damp but not excessively wet.
-
Temperature Monitoring:
- Use a compost thermometer. A good compost heap reaches between 130°F to 160°F during active decomposition.
What Can You Compost?
Once you’ve learned how to build a compost bin, the next step is knowing what materials you can compost. Here’s a quick guide:
Greens (Nitrogen-rich)
- Fruit & Vegetable Scraps: Peels, cores, and trimmings.
- Coffee Grounds & Tea Bags: Rich in nitrogen.
- Fresh Grass Clippings: Avoid too much of any single item.
- Eggshells: Adds calcium to your compost.
Browns (Carbon-rich)
- Dry Leaves: Great for filling out the compost pile.
- Pine Needles: Good as long as they’re layered correctly.
- Shredded Paper & Cardboard: Ensure they are non-glossy to avoid chemicals.
- Wood Chips or Sawdust: Provide structure but should be balanced with greens.
What Not to Compost
- Meat, Dairy, and Oils: Attract pests and create odors.
- Cooked Foods: Can lead to unwanted bacteria and vermin.
- Diseased Plants: Could spread disease to your garden.
- Weeds with Seeds: Prevents replanting of unwanted flora.
When Do You Know It’s Ready?
You might be eager to know when your compost is ready. Here are some indicators:
- Color Change: Compost should turn a dark, rich brown.
- Earthy Smell: A pleasant, organic smell should be noticeable.
- Texture: Smooth consistency with no identifiable pieces.
Generally, compost can take anywhere from a few weeks to several months to fully mature, depending on the materials used and your maintenance habits.
Conclusion: Why Is Composting an Essential Skill?
Knowing how to build a compost bin at home is not just an eco-friendly practice; it embodies sustainability, waste management, and soil enrichment.
By following these straightforward steps, you’re taking significant steps toward a greener lifestyle.
As you engage in composting, remember that the benefits extend beyond your garden. You’re helping our planet by closing the loop on waste and improving the overall ecosystem.
Happy composting!